I believe it is so true that Roblox has never failed to meet up demands of the user, and it continues to do so. Roblox always updates the platform’s features to the next level, thus always keeping up with the demands of users. We all have numerous features in Roblox that make users love Roblox. The list goes endless, like the best friend feature, Roblox studio, creation of avatar, customizing the avatar, creating games, chat room, etc. Out of all these, the one most commonly used is the chat room.
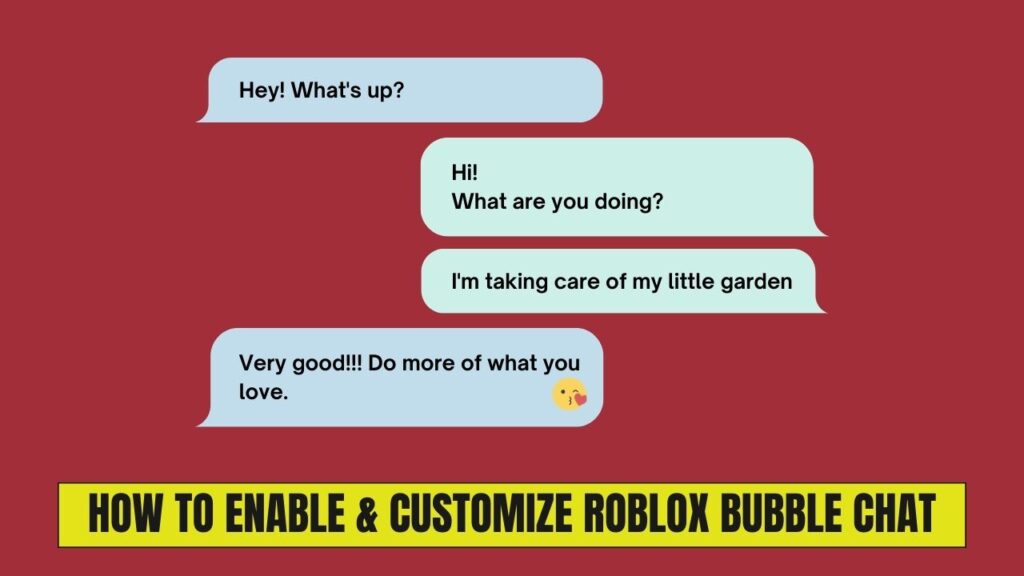
In the chat room, players communicate with one another by chatting through messaging feature. And the fun fact is they are used as a gossip center. Now, coming to the chat room, everyone loves the bubble chat feature, where the messages appear as a bubble right above the avatar’s head. This feature can be enabled and deactivated as per the player’s preferences. So, if you are wondering how to enable bubble chat, here is a guide for you to follow.
Key Takeaway
- One can enable the Bubble chat option through two methods- From the property section and the other from the local script.
- The players have a wide range of customization options for bubble chat, from appearance to shape and size.
Enabling Bubble Chat Feature
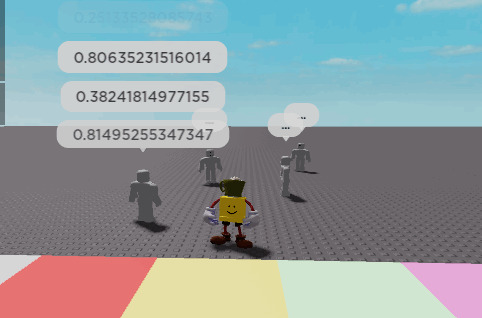
If you have been playing Roblox for longer, you would know how much easier it was to enable the bubble chat feature before. But after the updates, the feature is enabled by undergoing some steps. All the games in Roblox are not cut out for the bubble feature. Some games may involve the players being undercover.
In such games, using the bubble chat feature will end up as a disadvantage, as it enlightens the other players with the hiding position by displaying bubble chat above the player’s head. Well, for the other games, bubble chat can be an advantage as it reduces the time for a player in each time to go to the chat box. There are basically two ways to enable bubble chat, and they both have simple steps.
A. From Properties
In this method, you must activate the option to enable studio access to API services. This feature is allowed during the editing of the game.
- After enabling the feature, you must open the game if you want to add a bubble chat feature. This has to be done by opening Roblox studio, where you have to open the game.
- After opening the game, choose the option chat from the menu explorer. You have to select chat properties and go to the behavior tab
- Under the behaviour tab, you can see a set of options from which you have to activate the option of ‘bubble chat enabled.’
B. Local Script
The method of enabling bubble chat through local script involves editing the codes. If you are unaware of the codes in the local script, it isn’t a big deal, as it is just a minor change. Now you have to open your Roblox studio.
- Once the Roblox studio opens, enter the game from the Roblox studio. The game should be on the run, only then can you be able to edit the necessary changes.
- After the game boots up, choose the chat option from the “explorer menu.”
- You should choose an option named “client chat modules,” click the option, copy it, and stop the game by pressing the stop button.
- Now paste the client chat modules in the chat service option.
- Go to the chatting section and open the chat settings by double tap.
- There will be codes on the display that you must change to enable the bubble chat feature.
- At the 27th line, you can see a code indicating module.bubble chat enabled. The exact code will be “module.bubblechatenabled = playersService.Bubble chat”
- This is the code where we have to play our part and change it which by default enables bubble chat. From the mentioned code, all you have to do is remove the contents that appear after “=”
- After removing the content, add the word “True,” which will enable your bubble chat. Now, this wasn’t a hard job for those who don’t know to code, does it?
- After changing the codes, returning to the game, and resuming the game, you can see the chat you send appearing above your avatar’s head.
Customizing The Bubble Chat
Now customizing the features of bubble chat may not be as simple as enabling the bubble chat as it involves editing the codes, but still, you can edit the codes and make the necessary changes. To make the process easier I’ll give you the basic steps from there you can add the changes you want.
- In the Roblox studio, open the game you want to make the necessary changes.
- You must now copy all the folders from the chat option using F5, then use shift and F5 to paste them into the chat option.
- Now you have to enable the bubble chat if it is not activated and go to the bubble chat settings where you will be doing all the changes. Basically, I’ll tell you three lines that can be added easily, and you can try that.
- The first line you can add is the chat bubble color, which will be coded in line 213, where you have to type in the format “chatBubbleMain.ImageColor7 = color7.fromRGB(0,0,0).
- The next thing we are going to add is the tail color of the speech bubble, which you have to type next to line 225, and the code for the tail colour will be “chatBubbleTail.ImageColor7 = Color7.fromRGB(0,0,0).
- The last line you have to add is line 444, where the color of the text can be determined, and the code will be “bubbleText.TextColor1 = Colour1.fromRGB(0,0,0)”
- Along with the last step in line 443, you should replace auto-localize with False.
Well, these are the simple changes you can make to your bubble chat without much effort. Apart from these features, there are much more features to Roblox, which include appearance, behavior, gradient, images, and animation. Now let’s see what these features hold.
1. Appearance
Aspects of appearance include the color of the text and bubble, its font and size, transparency, and hue. While these are some essential characteristics, other appearance characteristics include corners of the bubble and its radius, tail visibility, space between the bubble and text referred to as padding, and maximum width of a bubble. Well, these are the characteristics, and code names will be as follows:-
- “Background Colour” for the color of the bubble.
- “TextColour” for the color of the text.
- “Texts” for the size of the text.
- “Font” for the font.
- “Transparency” for the level of transparency.
- “CornerEnabled” for corners of the bubble.
- “CornerRadius” for the radius for the corners of the bubble.
- “TailVisible” for the visibility of the tail.
- “Padding” is the space between the text and the edges of the bubble.
- “MaxWidth” is the width of the bubble that will be in pixels.
2. Behaviour
The behavior of the bubbles includes the screen time, duration, visible distance like bubble attachment, period of the bubble, spaces between the bubbles, maximum bubble count, and similar characters; these characters are coded as follows,
- “AdorneeName” for the attachment of the bubble to the part of the avatar’s body.
- “BubbleDuration” for the time duration of the bubble to be displayed on the screen.
- “BubbleSpacing” is the spaces between the stacked-up bubbles
- “MaxBubbles” is the maximum number of bubbles that can be on display.
- “MinimizeDistance” is the distance of the bubble that converts into an ellipse indicating the chatter.
These are some behaviors that come under this section. In this, there are default settings like the maximum duration of the bubble will be 15 seconds, and you can either reduce it or increase it.
3. Images and gradient
The images and gradients can include characteristics like Images and color of the image, whereas for gradients the features include color, rotation, transparency, etc. These characters will be coded as,
- The “Image” will be the ID of the image background
- The “Imagecolor3” will be the color of the image
- “Enabled” is to determine whether the gradient is enabled
- “Color” is the property for the gradient’s background
- “Rotation” determines the rotation of the background gradient
- “Transparency” determines the transparency of the background gradient.
Although the Image and the gradient have many more characteristics, these are the most fundamental aspects in this area. All you have to do is change the default values to the ones you need.
4. Animation
Animation includes basic characteristics required for animation; they are of two classes: size animation and transparency animation.
- “Enabled” is the code to determine the size and transparency of the animation and whether they are activated.
- “SpringDampingRatio” is the code to determine the damping ratio for size and transparency.
- “SpringFrequency” determines the frequency of size and transparency for the animation.
These are the codes for both the sections of the animations and for the damping ratio of value greater than 1 can cause the animation to be more rigid and slower, while a value between 0 and 1 can cause a bouncing effect.
Few Words For You!
Since the code will be harder to understand, I have also explained the purpose of the code, and you can change the value of the code and meet your demanded changes. If you find the process hard to follow, you can stop with the three codes I’ve described initially.
FAQs
How to set the maximum width of a bubble?
The maximum width of a bubble can be set using the “MaxWidth” code. The value of “MaxWidth” is measured in pixels.
What are the codes used to adjust the animation?
The codes used to adjust the animation are “Enabled”, “SpringDampingRatio” and “SpringFrequency”. These codes determine the size and transparency of the animation as well as the damping ratio and frequency.
What is the purpose of the “Padding” code?
The “Padding” code is used to adjust the distance between the bubbles and other elements on the screen. This helps in creating an organized and neat display.


![How To Change The Group Name On Roblox? [Exclusive Guide 2023] Change The Group Name On Roblox](https://techinfest.com/wp-content/uploads/2023/01/Change-The-Group-Name-On-Roblox-1024x576.jpg)