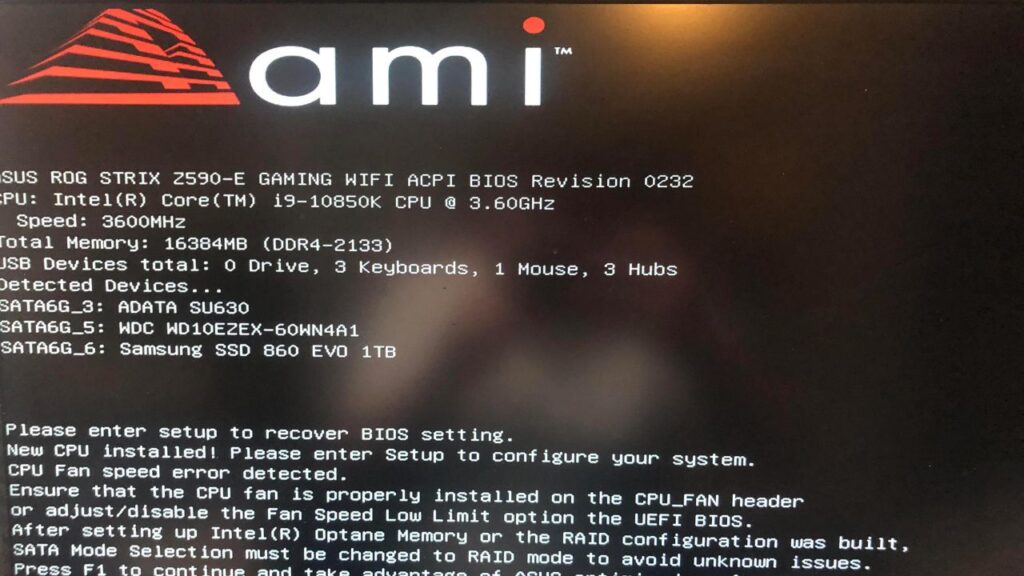
The most frequent hardware issue that may happen when booting or restarting Windows is error code 99, which concerns the motherboard. This problem can cause your device to be stuck with a black screen, rendering it unusable. Error code 99 suggests that hardware problems are impeding the proper loading of the OS. Nonetheless, there are various troubleshooting options accessible to rectify this motherboard error. In this article, we will investigate the causes of Asus Code 99 and present clear instructions on how to resolve it.
What can generate ASUS Motherboard Error Code 99?
If Asus Code 99 appears during Windows startup or while running an application, there could be various reasons for it. Prior to understanding the troubleshooting steps for error 99 in your ASUS device, it’s essential to comprehend the causes.
Causes of Error Code 99
- USB or Display Issue
- Hardware Defect
- Outdated OS and Drivers
- Overheating and Other Issues
Easily Fix Asus Code 99 on Asus Motherboard With 4 Solutions
If you want to remove the black screen issue along with ASUS motherboard error code 99, check out the solutions given below.
Method 1: Check Wires and Cables and Fix Connection Issues
If your ASUS device displays an error code 99 and is not able to boot up, it could be attributed to loose connections. Furthermore, unseated elements on the motherboard may be contributing to further complications on your ASUS device. In the event that you do not possess technical expertise, it is advisable to consult a professional prior to dismantling your ASUS computer or laptop.
Method 2: Repair the Damaged Master Boot Record in ASUS
A damaged or corrupted Master Boot Record (MBR) on your device could result in encountering error 99. This is due to the MBR containing important information about hard drive segmentation on your ASUS.
Steps to fix the MBR:
- Boot your computer from a Windows Installation Media USB or original Windows Installation DVD.
- Select your language preferences, and then click Next.
- Click Repair your computer > Advanced Options > Troubleshoot > Command Prompt.
- Type the following commands in the Command Prompt window, and then press Enter after each command:
bootrec/FixMbr
bootrec/FixBoot
bootrec/ScanOS
Bootrec/RebuildBcd- Let your Windows execute these commands, and then remove the installation drive or DVD once they are done.
- Afterward, exit the command prompt window and restart your ASUS device. If your system executes the instructions successfully, it will no longer display error code 99.
Method 3: Switch Off the Device and Reset CMOS Using Jumper
To eliminate Asus Code 99 in ASUS laptops or computers, one of the most effective solutions is to fix the CMOS. Follow these simple steps to do so:
- Turn off your ASUS device and disconnect it from the power supply unit. Remove all cables and peripherals before taking out the motherboard.
- If your device is still hot due to overheating, wait a few minutes or hours to cool it down. Then remove the panels carefully and take out the system motherboard.
- Find the CMOS jumper on the ASUS motherboard and remove all three pins from it. Shift the jumper to a new position – if it’s currently in positions 1-2, move it to positions 2-3.
- Use technical instructions to clear the CMOS and return it to its default position after 5-10 minutes.
- Turn on your ASUS device and access the BIOS screen. Navigate through the settings and reset the CMOS to its factory defaults.
Alternate Battery Method to Reset CMOS
If you encounter any technical difficulties with the aforementioned method of resetting your CMOS, an alternate approach can be attempted. Follow these simple steps:
- First, power down your PC and disconnect all peripheral devices, including the power cable and AC adapter.
- Next, carefully remove the cover of your ASUS laptop and locate the battery on the motherboard. The battery’s placement may vary based on your device model, positioned either vertically or horizontally within a holder and attached to a wire.
- Once you have located the battery, ensure that all power is disconnected before removing it from the board.
- Take a moment to clean any accumulated dust or dirt around the battery, then wait 3-4 minutes.
- Reconnect the battery to its original location and replace the device cover or panel securely.
- Finally, reconnect all cables and power cords to your ASUS device and power it on. These steps should effectively reset your CMOS and eliminate the motherboard error message 99 on your laptop.
Method 4: Replace the Faulty Processor and Install a New One
If your ASUS device experiences a CPU failure, it can cause problems such as error code 99 on the motherboard. If you’re confident that the processor is no longer functional, it’s recommended that you replace it. Here are the steps to do so:
- Confirm that your motherboard is compatible with the new processor and select the appropriate one for your ASUS device.
- Remove the CPU cabinet and locate the CPU cooler.
- Turn off the power and remove any obstructing components from the cabinet.
- Gently remove the cover of the CPU socket and carefully replace the processor, being mindful not to damage any of the pins.
- If needed, you can also replace the motherboard using this same method.
- Once the new CPU is securely in place, reattach the CPU cooler and close the cover of the cabinet.
- Turn on your ASUS PC to check if the error code 99 has been resolved on the motherboard.
In case, it still doesn’t fix the error, you may have to reinstall Windows or check for software issues.


