I will put the “Hyperx Cloud 2 Mic Not Working” issue under my most common issue list. I have reasons– people usually face it because new users often fail to control the sound settings that connect the mic to the device. You may also face the Hyperx Cloud 2 Mic Not Working issue if you have an outdated headset driver or windows version.
I believe most of the technical errors can be troubleshot by updating the basic application software associated with it. Also, your computer may be experiencing HyperX Cloud 2 mic not working on Windows 10 issues if you have accidentally muted, disabled, or failed to set up the microphone as the default device on your computer.
Let’s figure out the best possible ways to troubleshoot the “Hyperx Cloud 2 Mic Not Working” issue.
Troubleshooting Steps to Fix the Problem
The likelihood that the basic settings on your device are muted may lead you to assume that your microphone is not working correctly. Verify that the basic settings call volume, and media volume on your device are not set to a deficient level or are entirely muted by checking the sound settings on your device. But besides that, many other reasons can lead to complications, which can be sorted by following the steps mentioned below.
1. Checking Audio Settings in Windows
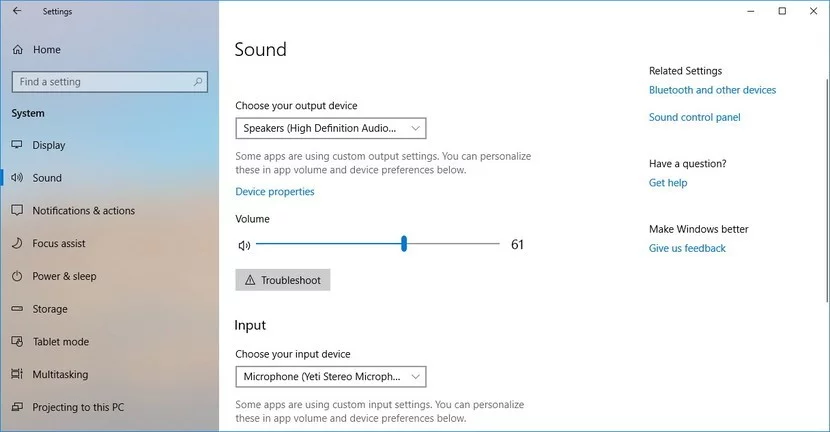
It’s possible that the issue with your HyperX Cloud 2 headset is due to incorrect sound settings. To resolve this, please follow the steps below to re-enable your microphone and set it as your computer’s default input device.
Step 1: Check Your Audio Settings
Start by checking that your audio settings are configured correctly. To access your recording devices, simply right-click on the speaker icon located in the bottom right corner of your screen and select “Recording Devices” from the pop-up menu. Make sure that the HyperX Cloud 2 Headset Microphone is listed, and if it’s not, check for any disabled devices by clicking ‘Show Disabled Devices’.
Step 2: Enable the Microphone
If the headset microphone is disabled, right-click it and select ‘Enable’ from the context menu. This should re-enable your microphone, though you may need to take an extra step to make it your default device. To do this, right-click on the Headset Microphone again and select ‘Set as Default Device’. When you’re done, click ‘Apply’ and then ‘OK’ to save the changes.
2. Resetting Audio Drivers on the PC
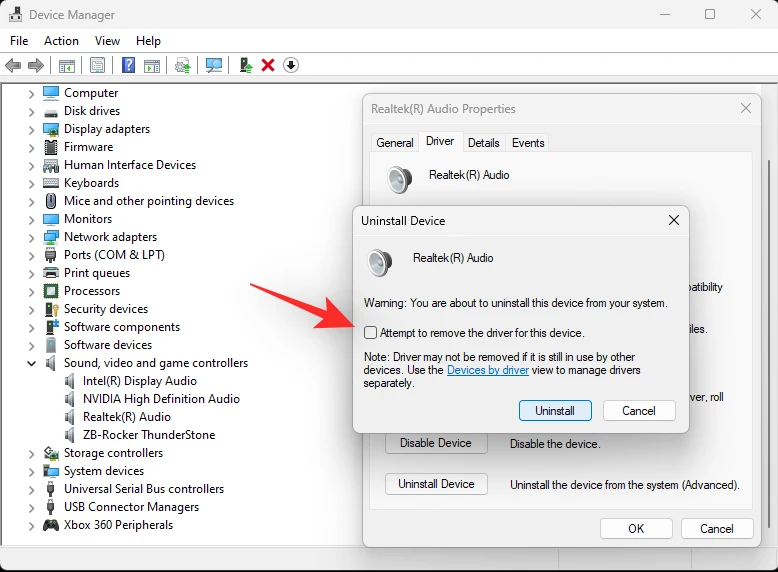
Updating your headset driver can be intimidating, but getting the most out of your HyperX Cloud 2 headset is essential. The mic won’t work properly if you’re using an incorrect or outdated driver, so updating is a must. You can use driver update software to make the process much easier. This program will scan your computer for outdated or missing drivers and prompt you to update them.
Here’s how you can do it.
- Download and install Driver Easy.
- Run Driver Easy, scan your computer, and detect any problem drivers.
- To ensure optimal performance, download and install the latest driver for your headset by clicking the Update button.
- Make the most of your system’s performance by clicking the ‘Update All’ button at the bottom right. Enjoy fast and efficient computing with automated driver updates!
- Restart your computer and log in again to see if the microphone is working.
To ensure your HyperX Cloud 2 headset is up-to-date, you might want to consider taking advantage of the Update All button located on the bottom right. With this Pro version feature, you can rest assured that all outdated or missing PC drivers have been revamped and are ready for use. Upon restarting after installations are complete, see if our audio auxiliary has returned back with full function capability as an extra assurance step!
3. Progress With A Updated Windows
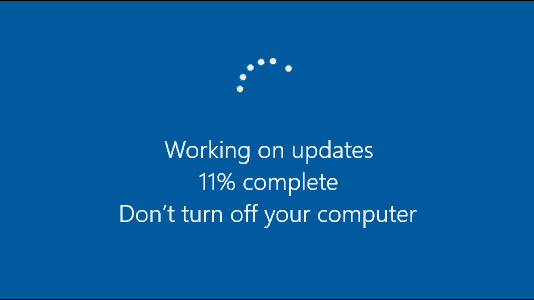
If your HyperX Cloud 2 microphone is not working, the first step you should take is to make sure that your Windows operating system is up-to-date. Updating Windows may fix any corrupted files or configurations that are preventing your microphone from functioning correctly.
Here’s how to update Windows:
1. On your keyboard, press the Windows key and type “check for updates”.
2. On the left side of the screen, click on “Check for Updates”.
3. Windows will now search for any available updates. If an update is found, it will be automatically installed when you restart your computer.
4. After restarting your computer, check to see if your microphone is now working.
If updating Windows didn’t fix the problem, you may need to reinstall Windows altogether. Before proceeding, it’s important that you back up any critical files on your computer.
Then follow these steps to reinstall Windows:
1. Insert the disk (or USB drive) containing the Windows installation files into your computer.
2. Follow the on-screen instructions to complete the reinstallation process.
3. Once Windows is installed, you’ll need to install your HyperX Cloud 2 headset according to the instructions provided by the manufacturer.
4. Check to see if your microphone is now working properly.
FAQs
Why isn’t my HyperX Cloud 2 microphone functioning properly?
The issue of your HyperX Cloud 2 microphone not functioning properly could be caused by incorrect audio settings, an obsolete headset driver, or an outdated version of Windows.
How can I resolve the issue of my HyperX Cloud 2 microphone not functioning properly?
You can resolve this problem by verifying and adjusting your audio settings in Windows, activating the microphone, updating the headset driver, or upgrading your Windows operating system.
How can I update the driver for my HyperX Cloud 2 headset?
You can keep your HyperX Cloud 2 headset up to date by using driver update software like Driver Easy. This program will scan your machine for any out-of-date or missing drivers and offer you the option to update them. Installing the latest driver updates can ensure that your headset is running properly and at peak performance.


![How to Connect Bluetooth Headphones to Xbox One? [4 Quick Process] How to Connect Bluetooth Headphones to Xbox One](https://techinfest.com/wp-content/uploads/2023/12/how-to-connect-bluetooth-headphones-to-xbox-one-450x253.webp)
